Have you built your Next.js web app? Deployment is a crucial step, but it doesn’t have to be complicated. Vercel simplifies the process by connecting to your repository and automating deployment. It supports GitHub, GitLab, and Bitbucket, making deployment seamless.
What is Vercel ?
Vercel is a cloud platform that makes it easy to build, host, and scale web applications. Designed for modern web development, it's widely used for hosting static sites and single-page applications (SPAs).
They make it easy for Front-end teams to develop, preview and ship delightful user experiences where performance is the default.
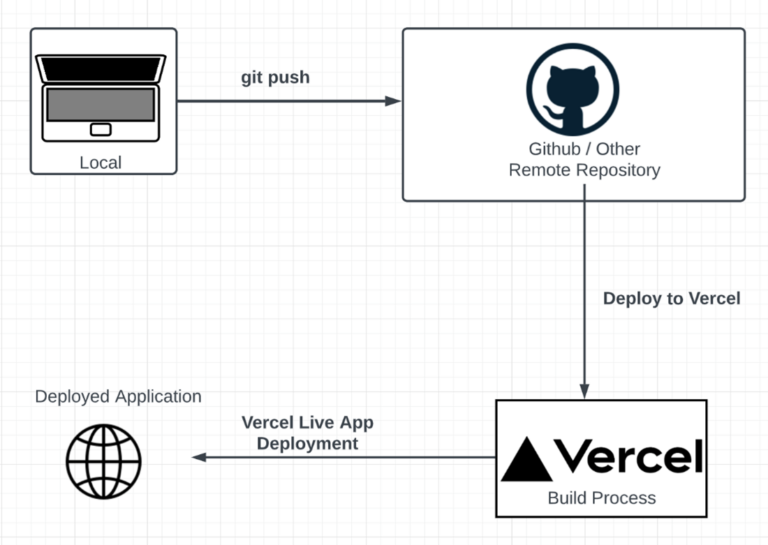
Here’s a simple diagram to show how Vercel’s deployment works.
Why use Vercel?
Vercel simplifies the continuous deployment (CD) process, saving developers time and effort. Unlike traditional CI/CD tools like Jenkins, which require setting up an instance and configuring a Jenkinsfile, Vercel automates deployment with minimal setup.
If a build fails, errors are displayed in the deployment logs. For the latest failed build, you’ll find the error below the deployment preview on the project’s overview page, with a direct link to the specific deployment details.
With Vercel, developers can focus more on building their applications rather than managing the CD process.
How to Deploy Next.js on Vercel?
Deploying with Vercel is simple! We’ll grant Vercel the necessary permissions to manage our application and handle deployment seamlessly.
For this tutorial, you can use any Next.js project. To keep things straightforward, I'll be using a basic Next.js project running on version 13.1.5
Follow these steps:
- Make sure to put your code into the repository, and we will use GitHub in this tutorial.
- Create an account in Vercel.
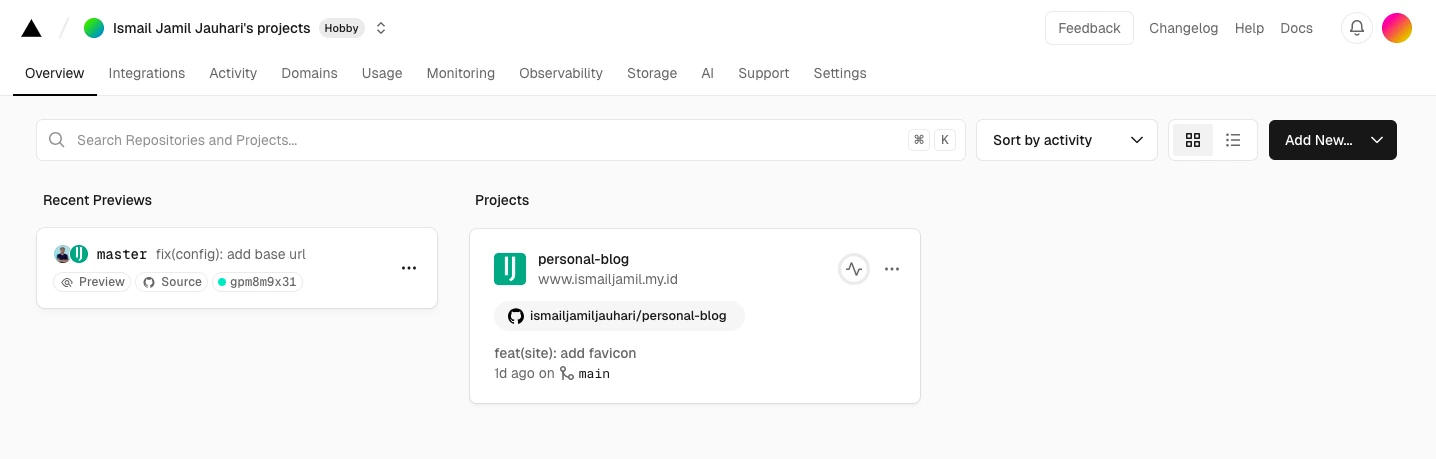
- Once you've created an account, go to your Vercel dashboard. If you already have projects, click Add New. If not, select Create a New Project to get started.
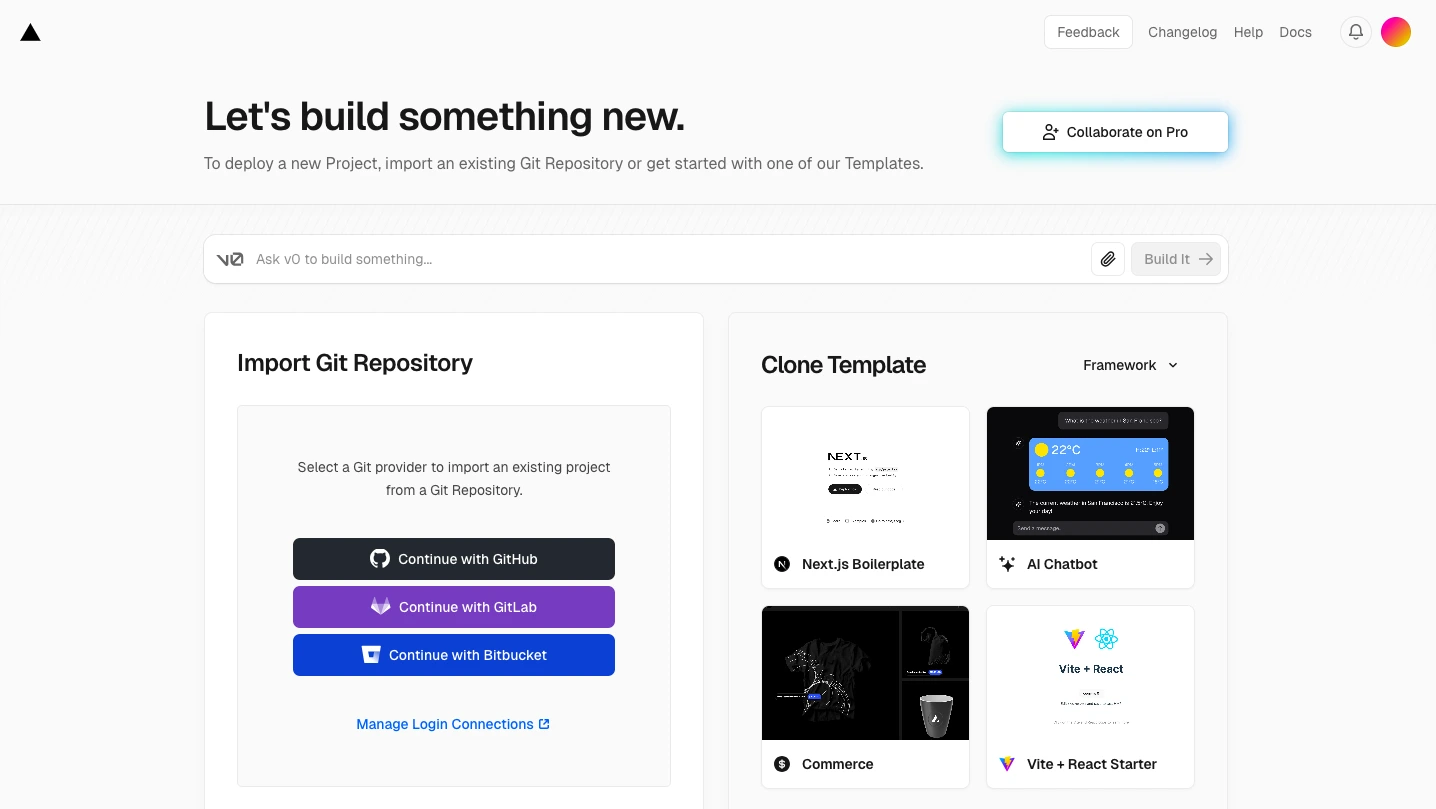
- On this page, we need to import your Git Repository first. Just follow the simple steps that they provide. After it’s connected to our repository, choose the project we want to deploy. We will need to sign in to our repository and allow the required access to enable Vercel to read our project in our repository.
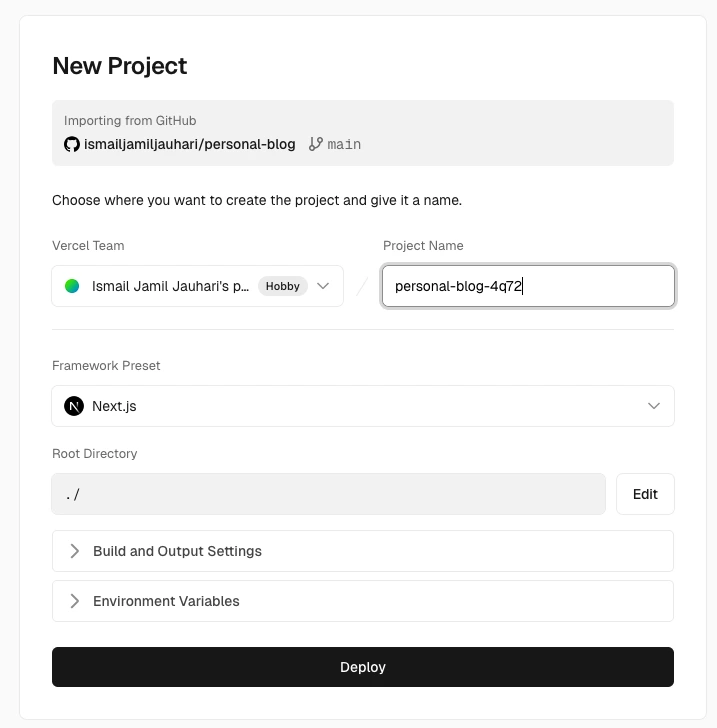
- After successfully importing our project from our repository, you will be redirected to this page. Here, we can click on the Deploy button to deploy our application. For now, leave the rest to default. We can check our deployment process at the bottom of the page later. If any errors are found, we can see the cause. The error message that Vercel provides is easy to understand.
- Your code should be successfully deployed after a few minutes and will be redirected to this page. To see/access our deployed application, click Go to Dashboard to find the deployment link


